Showing posts with label Miniature Quilt. Show all posts

Saturday, 21 March 2015

Sarah and Shane's wedding quilt

I realized I had not posted pictures of Sarah and Shane's wedding quilt yet.  I had it finished for awhile, but because they live several provinces over, way out in lovely PEI, I had to wait with posting pictures until they got it :-).  They were married last summer and I had hoped to send it along with someone driving to PEI, but ended up sending it off to them in the mail.   I had started this One Block Wonder quite awhile ago using a lovely Jason Yenter print.  When I heard that Sarah was getting married, I thought this would be the perfect quilt for her.  Sarah took quilt classes from me for a year or so before moving to PEI.  I knew she would love this one as a quilter herself.

A strip of the original fabric was pieced into the backing
This photo shows more of the original fabric, but the colours are more blue.  This fabric was very hard to photograph.

the final layout with some of the border pieces added
leaf quilting in the blocks

the label
A photo of the finished quilt with the little one I made three years ago for my husband's office at school.  He is a High school vice principal and when they built the new school, his office needed something for the wall.  We called this quilt "Stepping towards the Light" as he works in a Christian School.  I wanted to use all the cubes I had made, so he suggested putting one towards the right "since there's always one kid that falls off the wagon" :-).   
It was made using a 2" strip cut off the 6 layers of fabric before I did the larger one.  It was difficult getting a good photo of the quilt on the wall as it is hanging beside a window.  The colours are more like the photo above.  This little quilt won 2nd prize at the Plowing Match quilt show a couple of years ago.

My friend, Roxene, bought the exact Jason Yenter print, but in the red colourway and is also making a OBW with it.  I will post photos of that one when it is finished.


Friday, 25 May 2012

Insanity revisited....

After finishing my mini tulip quilt a few weeks ago, I had a couple of friends over to sew together.  They wanted to try one too!  I was going to stick to my resolution to work on UFO's and besides, I had vowed that I would never do another mini tulip quilt!  When I had posted that sentiment on face book, my sister commented "Oh dear, I was hoping for one in red, yellow and blue!"  Amy and Lynn really wanted to try these little tulips, and Amy reminded me that I could do a little quilt for my sister and join them.  Since my sister had her birthday on May 13th, I succumbed to peer pressure (yes, at my age!!) and decided to join them.

All our mini tulip blocks

blue border.?

or red border???
Blue border won out and since I couldn't decide which colour lippy to go with, I added one of each :-)

The little quilt measures about 5" x 7"
My sister was 'over the moon' with her little quilt.  It was worth it :-)!!

Tuesday, 8 May 2012

Spring mug rug!

I taught a class on paper piecing this week and made myself a little mug rug for Spring out of my tulip :-).  It definitely is vibrant LOL.  If the coffee doesn't wake me up, the colours will!!

Tuesday, 24 April 2012

Mini Tulips Finished

I just realized it's been way too long since I updated my blog.  That's because I've been busy actually finishing projects.  We had a local quilt show last weekend which gave the push to finish things.  


The little mini tulips quilt that I started in the workshop taught by Kathy Wagner is finished.  It was a challenge working with such tiny pieces.  I should have located my scrapbooking tweezers to help pick up the pieces :-).  While assembling the tiny blocks, which are composed of 16 squares and half square triangles that measure 1/4" finished!, I aimed them at my trusty Singer 15-88 treadle and hoped they came out the other end sewn together!  Sorry about the upside down measurements on the photo, but it gives an idea of the size: 


 Here is the finished quilt, complete with binding AND a label!  The label took up half of the back.  I should have just made a large label and used it as backing LOL


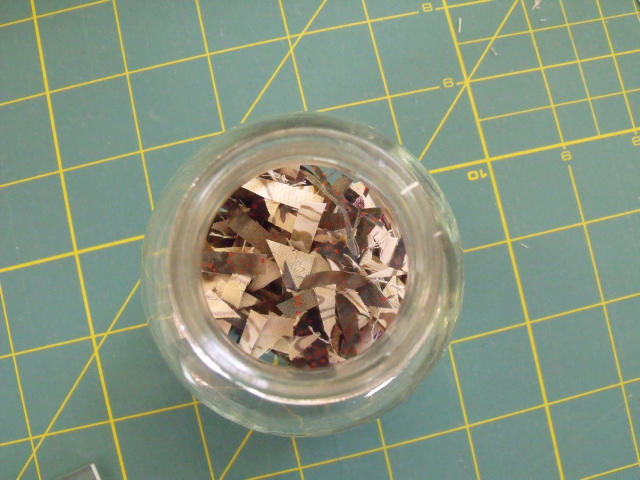
Kathy is a real enabler!!  I am actually saving the trimmings from these little blocks as well as cut offs of other blocks and bought two more small glass jars like this one at the local thrift shop on Saturday so I can store the different colours in pretty glass jars!!


 The scraps do look very pretty in the jars, especially the bright coloured ones.  When I have the jars filled with some colour, I'm going to go to Kathy and get instructions on what to do next :-)


Saturday, 10 March 2012

Kathy Wagner workshop

I had the wonderful privilege of taking a workshop on Miniature Quilts taught by Kathy Wagner yesterday. What fun we had. I'm looking at garbage in a whole new way. I actually saved the trimmings from my tiny half square triangles and am looking for a glass jar to store them in. Wow, are we crazy or what eh? I will say with McDonald's "I'm lovin it" LOL.

Kathy had suggested bringing along scraps leftover from another quilt. What a great idea. I will be storing some of my leftovers in ziplock baggies. Maybe I'll find a pretty basket to store them and keep it beside my sewing machine for instant mini gratification when I need something fun and small to work on.

I actually took Kathy's class about 7 years ago when I lived in Hamilton for a couple of years when DH went back to school to get his B Ed. degree. These are the four quilts that I made after that workshop:


This one was done with strip pieced paper piecing:


This is the same block, but arranged differently:

Here is Kathy starting us out with instructions and hints on sewing with these tiny pieces, thread to use, needles that work, etc. We also got a thick stack of pages of web sites, patterns and ideas to take home. My head was spinning with new ideas. I love making mini quilts and this is only going to make it worse :-).


I decided to challenge my self and make 6 mini tulip blocks consisting of 16 tiny little 1/4" finished squares, some of which are half square triangles!! They were made with 1 1/4" squares and then trimmed down to 3/4"..wow, those were tiny! And, that produced the trimmings which are going into the above mentioned jar :-). Here are my pieces all marked and lined up to start sewing:

You can hardly pick up these pieces!! Tweezers may have come in handy:

The first half square triangle:

Voila...by the end of the day I got three little blocks done, the pieces cut and all the half square triangles made to piece the last three:

And, I thought my 2" one block wonder hexagons were small to work with!!!

One of my quilt students dropped by this morning and I showed her the three little tulip blocks on my wall I made yesterday. Her response: "Why?" Now, that's a really good question Danielle, and it kept me pondering all morning while I was doing my housework. Why do we do these crazy things? I can think of a few reasons:

#1 It's good to challenge ourselves to think (and do) outside the box.
#2 It keeps me off the streets and out of mischief :-)
#3 Kathy dared us!
#4 It's just plain fun to see if something can actually be done.
#5 The actual little quilt (when I get it finished) will look very cute somewhere in my sewing room.
#6 .......I'm sure there are more reasons.......

Thursday, 18 November 2010

Playing with Mini's.......

About 15 years ago, I made a diamond log cabin Christmas tree skirt and taught a class eventually to a few friends. The original instructions were on my old computer that was stolen. I didn't really want to make a whole new sample at this point so my brilliant husband suggested making a mini version since I love making miniatures. What a brainstorm!

Here is a photo of the original tree skirt:

Go ahead and ask why on earth I would put the dark side to the inside and the lighter side on the outside? There is a reason for that!! The carpet in our old house was very nice and thick and great for all the teenagers that would descend on our house at that time! However, it was that lovely 80's rust colour! I wanted to minimize the clash with the red so I put that side further under the tree :-). It does still bug me!! However, I do still put it under my tree each year!

Here is a photo of the diamonds for the mini tree skirt to be sewn together. The logs are 1/2" finished. I have a small tree so I'm hoping this will be a perfect little tree skirt for it :-)

I also made half diamond triangles, using Marci Baker's method and ruler and I'm hoping that they'll fit properly to made this one a hexagon shape. I'll keep you posted when I sew them together :-).

Monday, 23 November 2009

Three sister's Quilts

My sister from BC visited me in June for the first time in 14 years. We had a great time catching up. I had only been quilting for a few years the last time she was here so we had a great time exploring patterns, fabric, UFO's, etc. She was intrigued with the Spinning Four Patch and when I told her I was contemplating doing a mini, she was all excited. She loves miniatures even more than I do :-). I let her loose in my fabric stash with the instruction to find a small scale busy print that she liked. She chose a pretty sea shell fabric that I had purchased for another project, but it was not suitable so went into the stash. It was perfect for this project. We cut out the squares 1 3/4". Here you see Thea playing with the layouts of the squares and coming up with her favourites.

Squares ready to sew together:

First squares sewn and on the design wall:

We had quite a few squares so decided that we would get our youngest sister, Eva, involved as well and make three little quilts. We would each choose our own colours for sashing and binding and our own layout. Thea chose her favourite colour combination, blue and yellow and decided on this layout:

Not sure if the quilting in the border shows up on the photo (click on it to enlarge it), but I quilted stars and loops in the border:

Eva chose to set her blocks on point and have hers made into a mini table runner for her patio table and chose blue and pink for her accent colours:

I quilted little funky flowers in the light blue squares:


Quilting on the back of the quilt:

I decided to make a little doll quilt for one of my antique doll beds and went for the brighter red for mine. I also set the squares on point and added a narrow gold border and used the same for binding:

I quilted pansies in the blocks and swirlies in the border:


Here are the three quilts altogether:

Now to wrap them up for Christmas and get the one for Thea in the mail :-).

Tuesday, 3 February 2009

A Quilt for Kit!!

On Friday afternoon, I picked up Fons & Porter's new magazine, "Easy Quilts". I browsed through the contents page to see if there was anything interesting and spotted this photo:


The magazine just had to come home after that! The doll pictured is "Kit" from the American Girl Collection of historical dolls. I have had this doll for about 8 or 9 years and have never made her a quilt yet!! So, Friday night, I abandoned working dutifully on another UFO and decided to make this little quilt for my doll.
By 10:30, I put the last stitch into the binding, so it's not a UFO!! Doesn't she look happy with her new quilt?

I used fabrics from the "XOXO The Cat" by Wendy Slotboom for In The Beginning fabrics. I had a collection of FQ's from that line (the yellow is a 30's repro print). What fun to make a little quilt in one evening. I sewed the entire quilt on my trusty Singer 15-88 treadle. I'm sure Kit's Mom would have sewn on a treadle sewing machine back in 1934 :-).


I am working on my UFO's again :-).